Welcome back! Before I get to the meat of this post, I wanted to do a brief meta-update. Work continues on the Project Yamhill Front Panel design, albeit a little slower than I have been hoping for. Because this is by far the most critical part of the whole project to get right, I’ve been questioning multiple design choices and have been revising things. I don’t expect to get it perfect on the first try, but I’m hoping to avoid having to do a major redesign right out of the gate.
I’ll be taking a week off from work for some personal stuff, so the next update is probably two to three weeks away. Thanks for hanging in there!
When I started this Substack, I imagined that it would exist solely for the purpose of Project Yamhill, but I realized that was probably not the most ideal way to use it. So I will be moving more content that I would post on my personal blog onto here. The operating reports and more personal items will stay on the personal blog but I’ll be posting project and building content here in the future.
Now that things here at our new home have settled down into a somewhat-normal routine, I’ve been eager to get back into the operating side of the ham radio hobby. One thing that has piqued my interest over the last few years has been Parks On The Air, an operating activity that is a great incentive to create and optimize a portable/mobile ham radio station. I’ve been doing a bit of chasing when I can, but had been procrastinating on activating an entity until recently.
My first successful activation showed me that I’d like to try some different antenna solutions on future activations. I’ve been watching quite a few POTA YouTubers, and a lot of them seem to like deploying some form of shortened/loaded vertical antenna (seemingly second in popularity behind the classic end-fed half-wave with built-in matching network). This looked like something I’d like to try, since it wouldn’t require taking a mast with me or finding a way to get a line in a tree. Just set it up on the ground and get QRV. Also, quite a few years ago, I constructed a PAC-12 vertical for myself and it worked reasonably well, so I knew that the basic design was sound.
There seem to be many fine variants of this antenna type out there that are suitable for man-portable ops, so choosing a specific one was a bit of a tough decision. In the end, I settled on the Buddistick Pro for a couple of reasons. First, I’ve used a Buddipole in the past and knew that it could work well in this exact configuration. Also, Buddipole is a local company (I used to live very close to their HQ) and I’ve had some dealings with Chris W6HFP in the past, so I wanted to support a local small business. (On a side note, I worked Budd W3FF last Field Day and he was bicycle mobile with a Buddihex beam pointed my way, and WOW did he have a great signal here).
The Buddistick Pro comes in a very nice bag and has everything that you need to get it on the air…well technically. It’s critical that the supplied counterpoise be elevated at least a couple of feet off of the ground, supported by something non-conductive, in order to radiate correctly. I know this to be true because I’ve used the Buddipole antenna in a very similar configuration years ago. I imagine that they expect you to tie off the end of the counterpoise winder to a tree, picnic table, or something like that, but I don’t like the idea of just counting on something suitable for that function to be on-hand at the activation zone. In the official product photos, you can see that they show it set up with a trekking pole as the counterpoise support. That’s a fine solution, but I don’t even have a pair of those right now, and it’s probably not something I need in order to activate most parks.
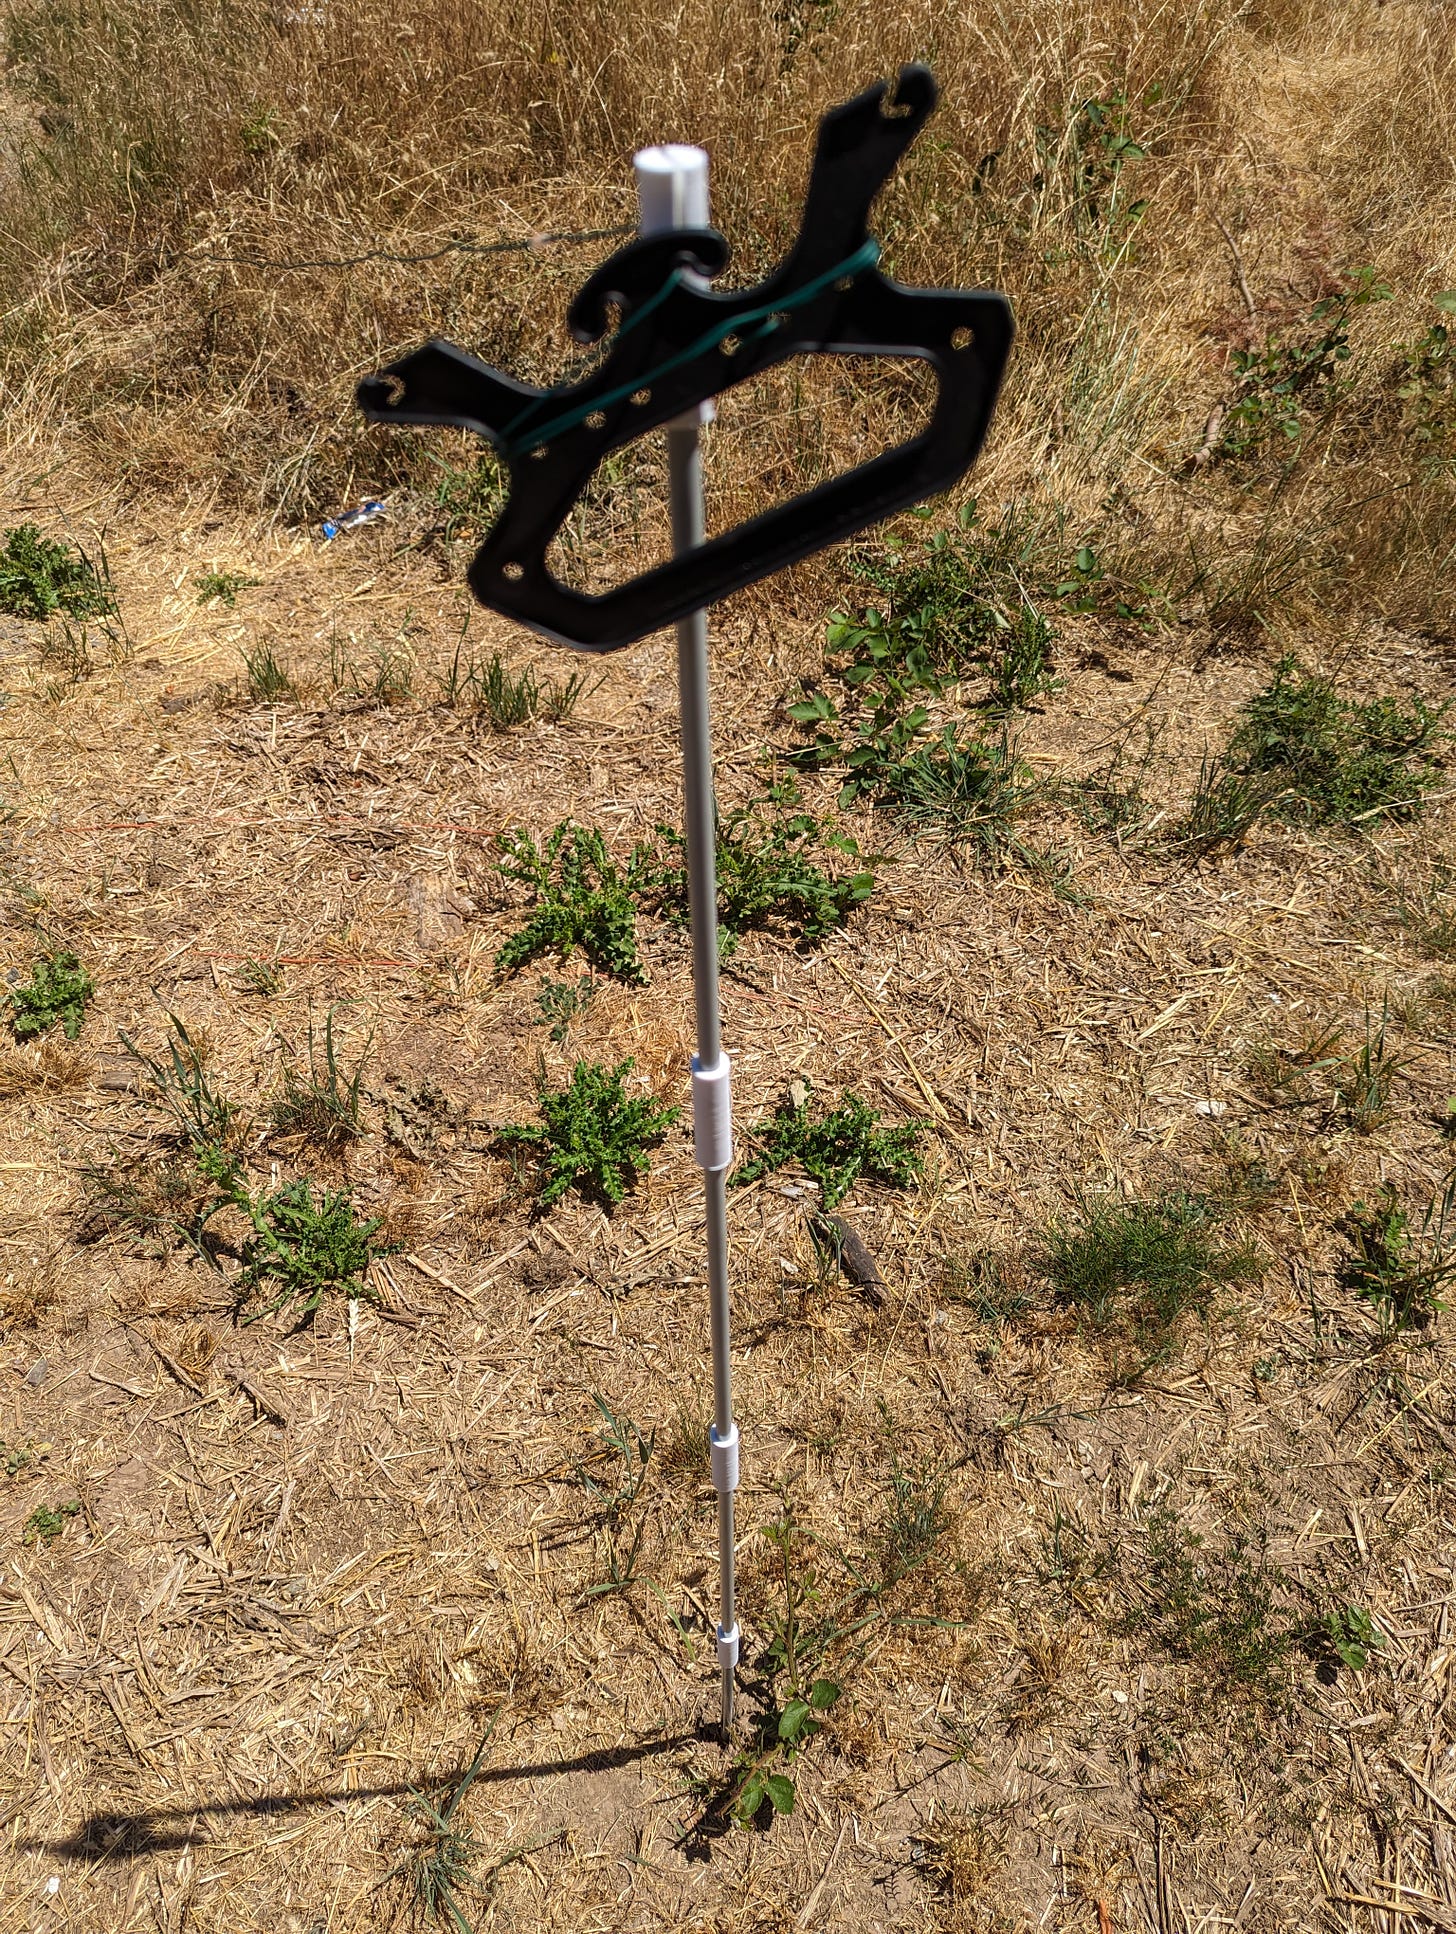
Therefore I set out to find a solution that would be (a) cheap (b) lightweight and compact (c) would fit in the existing Buddistick bag. Turns out that there were some extra elastic loops in the Buddistick bag that were perfect for the solution that I came up with. All it takes is one 4 foot long 3/8” diameter fiberglass rod fence post from the farm store and a handful of 3D printed parts.
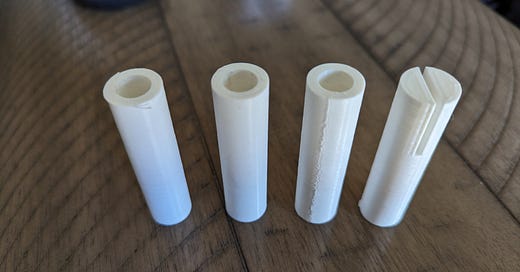
Very simply, all you have to do is cut the fiberglass rod into four equal sections of one foot length each, then print out some copies of this coupling system that I whipped up in FreeCAD. When in use, the four lengths are connected together via three of the coupler pieces, and then one support piece is placed at the top of the rod. It has a notch where you can rest the counterpoise wire so that the wire winder and tension of the counterpoise will hold it in place.
When broken down for storage, the pieces fit perfectly within the stock Buddistick case, and add very little additional weight.
I haven’t had a chance to actually use this antenna in the field yet, but that should be remedied very soon. I did do a dry run of the antenna and preset some of the coil settings on my property, so I know that the counerpoise support does the job just fine from setting it up here. If you decide to try it for yourself, I would recommend using PETG filament, as PLA will sag and warp when exposed to much direct sunlight. Check the notes in my Printables listing for the printing settings.
I hope that someone finds this helpful. With any luck, I’ll have some more activation reports for you on my personal blog in the near future.


