

The Woes of Integration
The Woes of Integration
The lamentation of an engineer

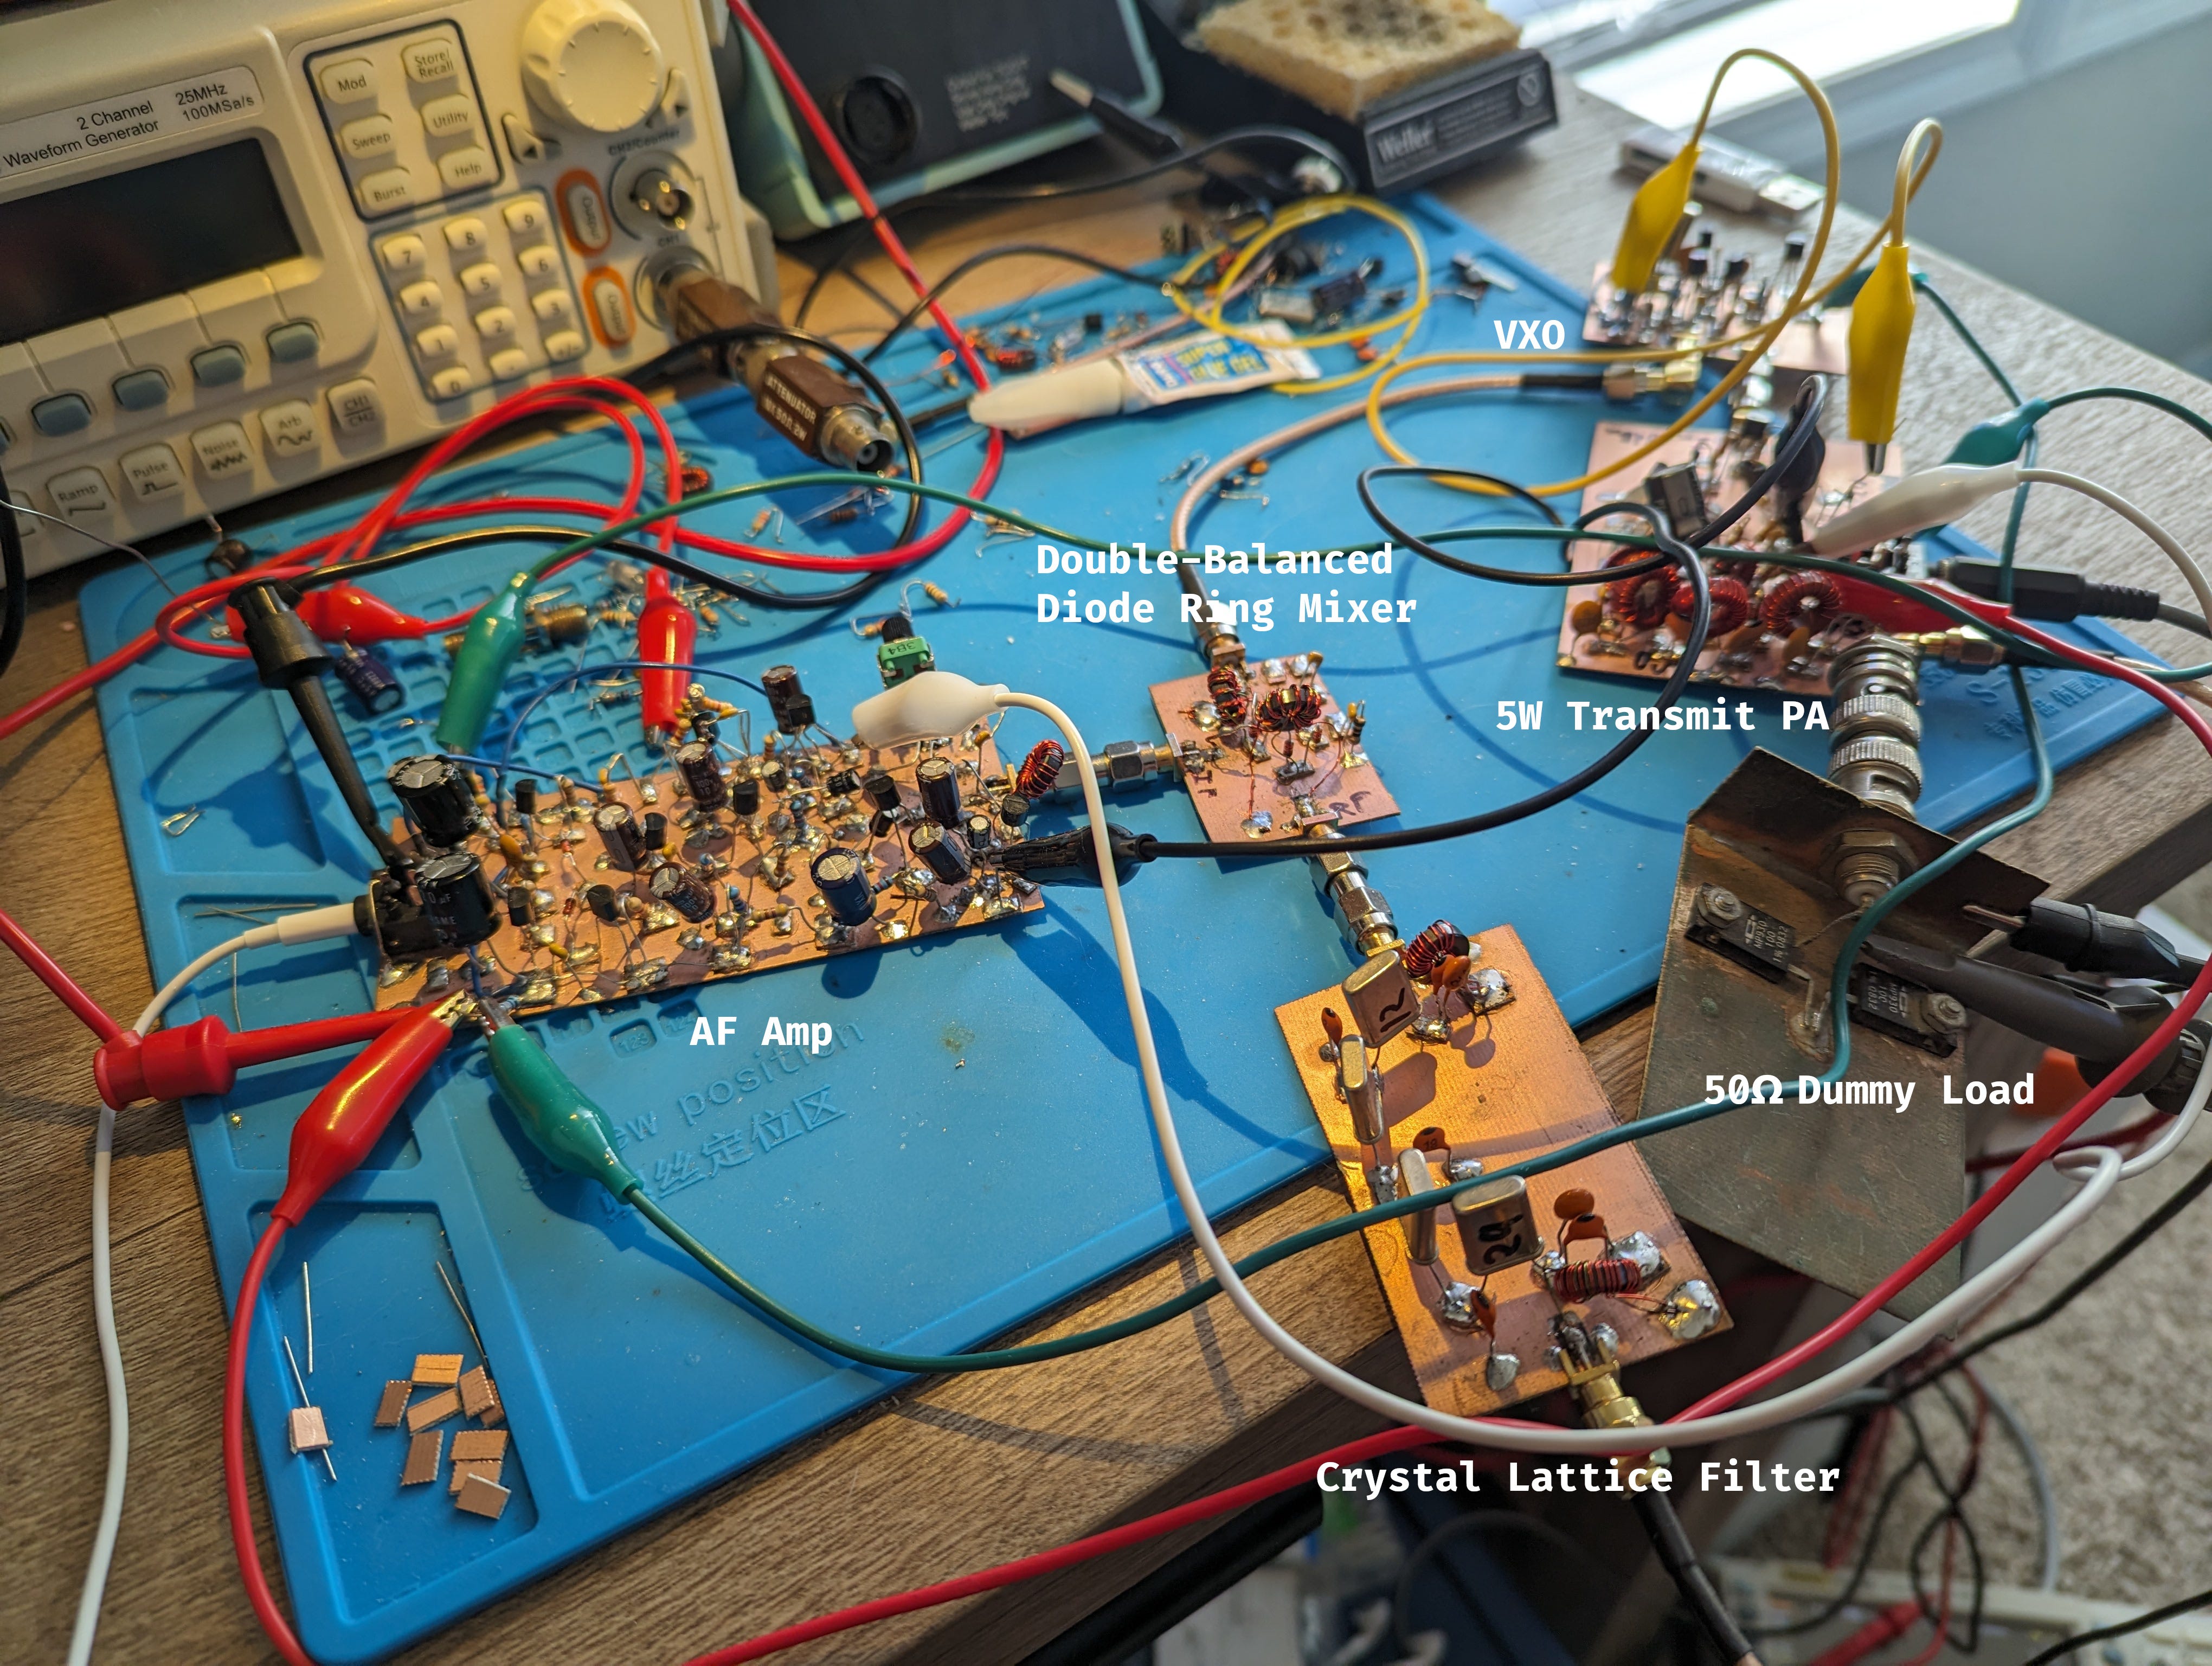
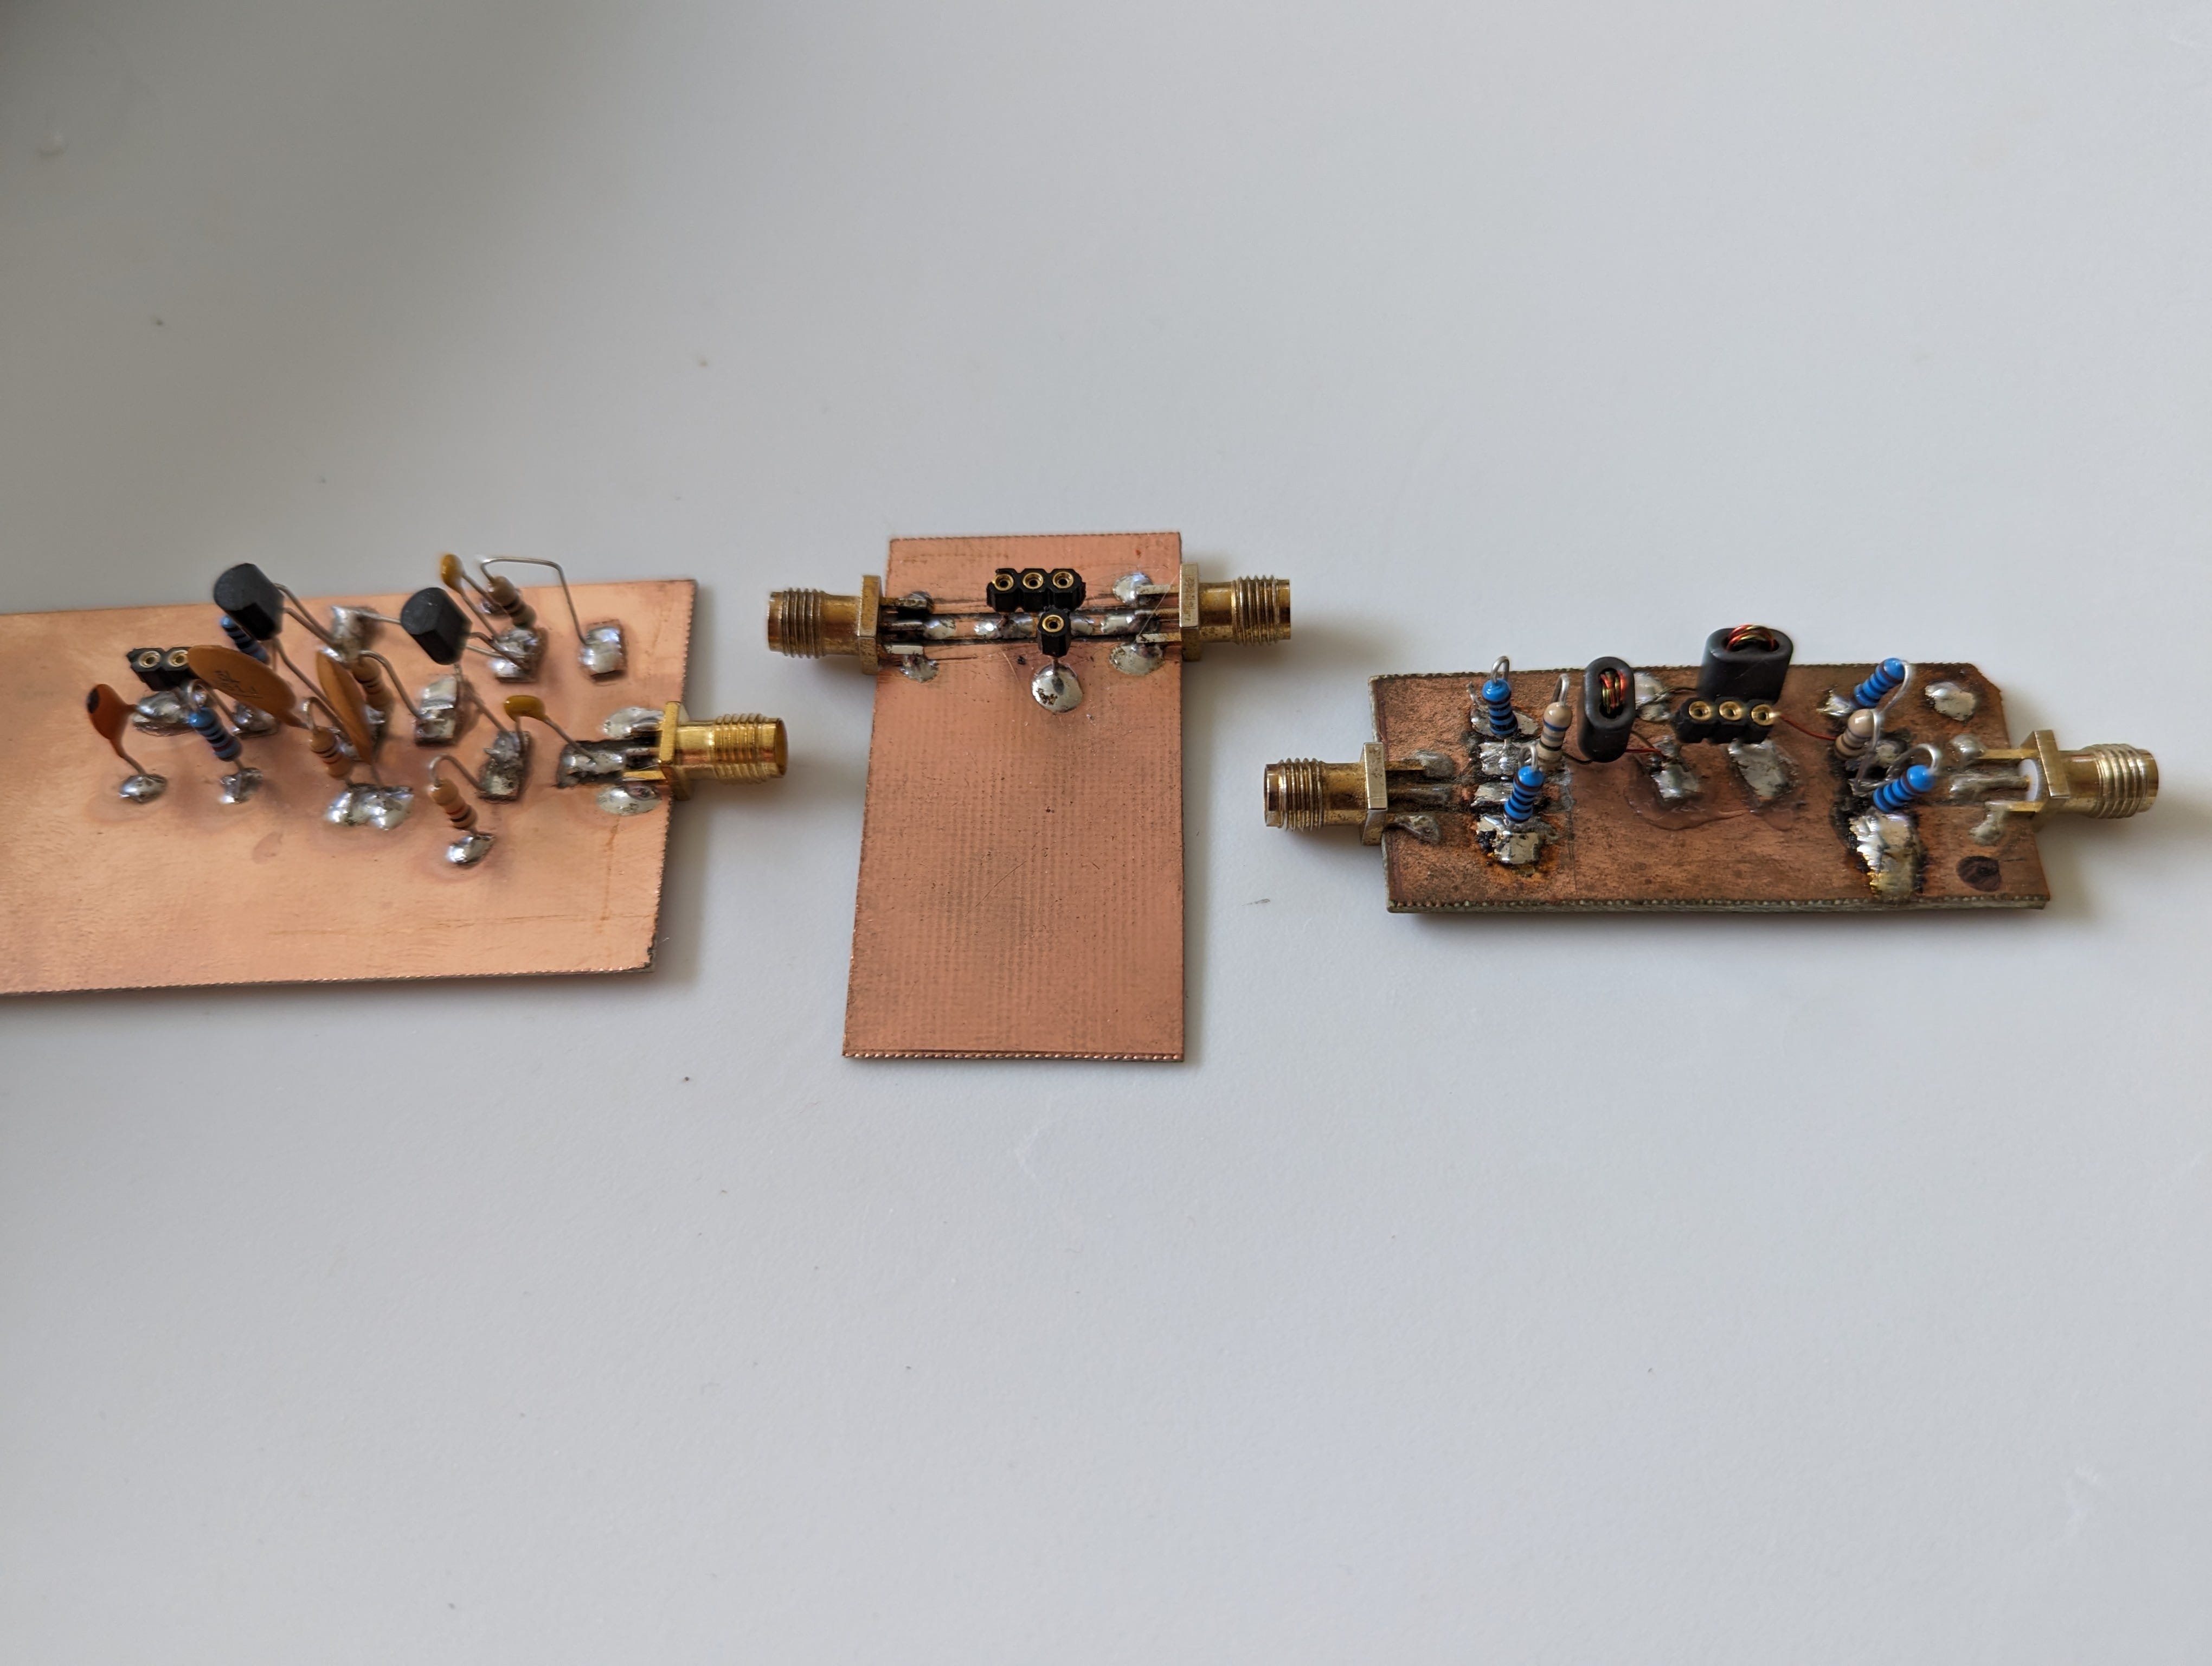
The latest happenings on the NT7S workbench haven’t been directly related to the first tranche of Project Yamhill PCBs, but are definitely related to the project as a whole. It’s been a few years since I’ve melted any solder in earnest (meaning in actually building a radio, not just in doing some dumb repairs), so I wanted to get back in the groove by putting together some circuits from older lab notebook entries into a simple, yet usable, direct conversion transceiver. As you can see in the photo above, the construction method that I used is kind of a hacky version of the method that will be used in Project Yamhill: individual module boards connected with SMA RF interconnects and wire jumpers for DC power and signal lines.
Along the way of designing this simple transceiver, I was able to get reacquainted with a lot of old reliable tools and test equipment. A major part of the plan with Project Yamhill is to make recommendations for affordable test equipment and give very detailed information and procedures for using this equipment to measure and characterize the circuits and components used in radio systems. This rig is giving me a first pass in using this equipment and simple test jigs in order to successfully make a functioning transceiver from bare components.
I was able to take an existing audio amplifier design from my notebook and tweak it (still working out some final tweaks), along with a discrete component double-balanced diode ring mixer, and a basic VXO circuit that all worked as expected, and then use some online and application-based design tools, in combination with the basic test gear, in order to create a crystal filter and class-E transmit PA chain so that all of these parts can be integrated to make a functioning transceiver. So far, everything has worked out well and I’m about 95% of the way to having a real radio. The last bug that I need to stamp out in this radio is in the muting/QSK. The muting circuit works well when there’s not a transmitter integrated into the system, but there’s some unwanted impulse (a bit of thumping) on key-up and key-down when the entire transceiver is connected together. It’s not super-objectionable, and is certainly usable as-is, but I want to eliminate this if I can so that this rig can have very pleasant keying.
Speaking for myself at this point in my ham “career”, the most difficult part of any project isn’t in the design of the individual circuits, it’s in the integration of the circuits into a coherent whole. That’s one of those things that’s tough to give blanket advice on, because each unique collection of circuits will all have their own unique set of interactions, and some of those interactions will be unwanted and unforeseen. I’d like to be able to help new homebuilders get over such hurdles in their own work, but because there is no one-size-fits-all approach, I’m not sure what I can do in this regard. I’ll ponder it further. Please leave a comment if you have any good ideas.
So even though it’s not like there was much doubt this radio would work in general, it’s nice to validate with an actual functioning radio that this type of construction does indeed work. This radio helps me to get back into the game, so to speak, and is going to be directly related to this Substack and the relaunch of Etherkit.
So What’s This New Radio All About?
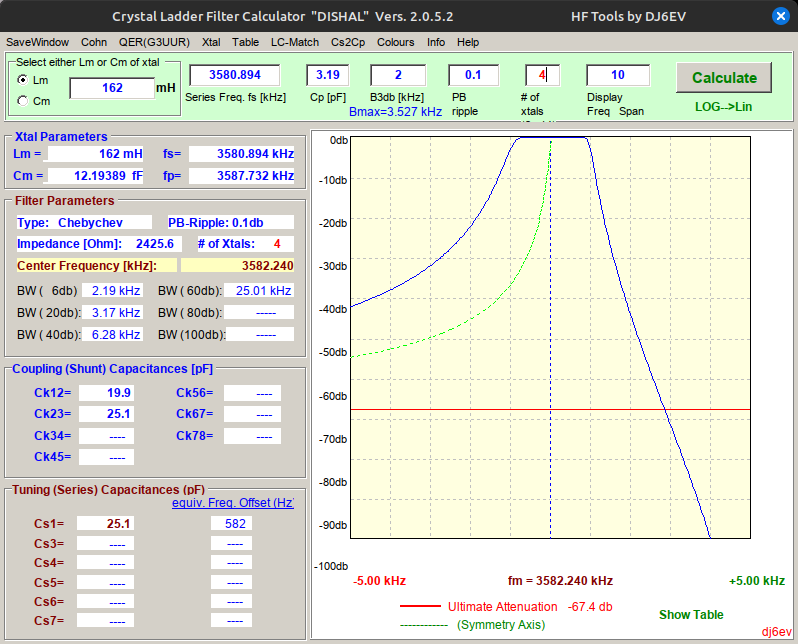
Many years ago, I purchased a huge box full of 3.582 MHz crystals. I think it was quantity 5000 or something like that. I’ve been wanting to do something with these rocks ever since I got them, something that would be fun and relatively simple. I’ve always thought it would be nice to use them in a radio made of all discrete parts, so I decided recently that now was the time to design such a rig.
I’m not going to get into too many details yet, but I’ll give you some broad ideas. The radio will use all discrete components (maybe I’ll cheat slightly and use a 3-terminal voltage regulator, but I could use a zener as well), and will be essentially a fixed-frequency direct conversion transceiver with a crystal filter receiver front end, in lieu of the typical LC tuned circuit type of front-end filtering. This will allow me to use up plenty of those crystals in each radio. Obviously, with a fixed frequency and being put on 80 meters, it will be pretty limited in usage, but it could be a fun and unique way to get some RF on the air and hopefully have QSOs with like-minded hams.
I want to make this a kit for sale, and make it for a very cheap price in order to encourage people to enjoy the fun of a simple, discrete component radio. Almost like an “impulse purchase” at the supermarket. Much like the Pixie or Rock-Mite. I also want to give some away as a reward for those who refer subscribers to this ‘stack. Once I nail down the design 100%, I’ll think through how exactly I want to implement that.
What’s Next
Since I’ve been playing with this design and have been listening a bit on the air (not just on 80 meters, I also put a 40 meter VFO and filter on it so I could listen to that awesome band), I realize that I’ll really need some good audio filtering for the Project Yamhill direct conversion receiver learning module. So I believe that I’ll be drawing up an op-amp based filter module that can be included with the first tranche.
Since I’m getting closer to getting the first tranche of PCBs sent to manufacturing, that means testing will be coming soon as well. I’d like to get started in building out the additional online infrastructure needed effective project communications, which in my case means a chat server. I know a lot of tech guys love to use Discord or Slack, but I don’t care for proprietary, closed, and controlled systems, so I host my own Element instance on my own VM. I don’t have anyone in my Project Yamhill rooms yet, but if this sounds like something you’d be interesting in joining, then hit me up in the comments and I can post the join instructions.
Thanks again for your continued support and Happy Thanksgiving to all of my American readers!
That was a fun and interesting blog!