


Activation of US-0213 with the MAX2681 Transceiver
Out to the field

As Project Yamhill nears actual physical implementation, it’s time to start building some more real-time, two-way communication. We’re starting to get some beta testing and discussions going! If you’d like to participate in Project Yamhill chat, please click on the link below. Thank you!

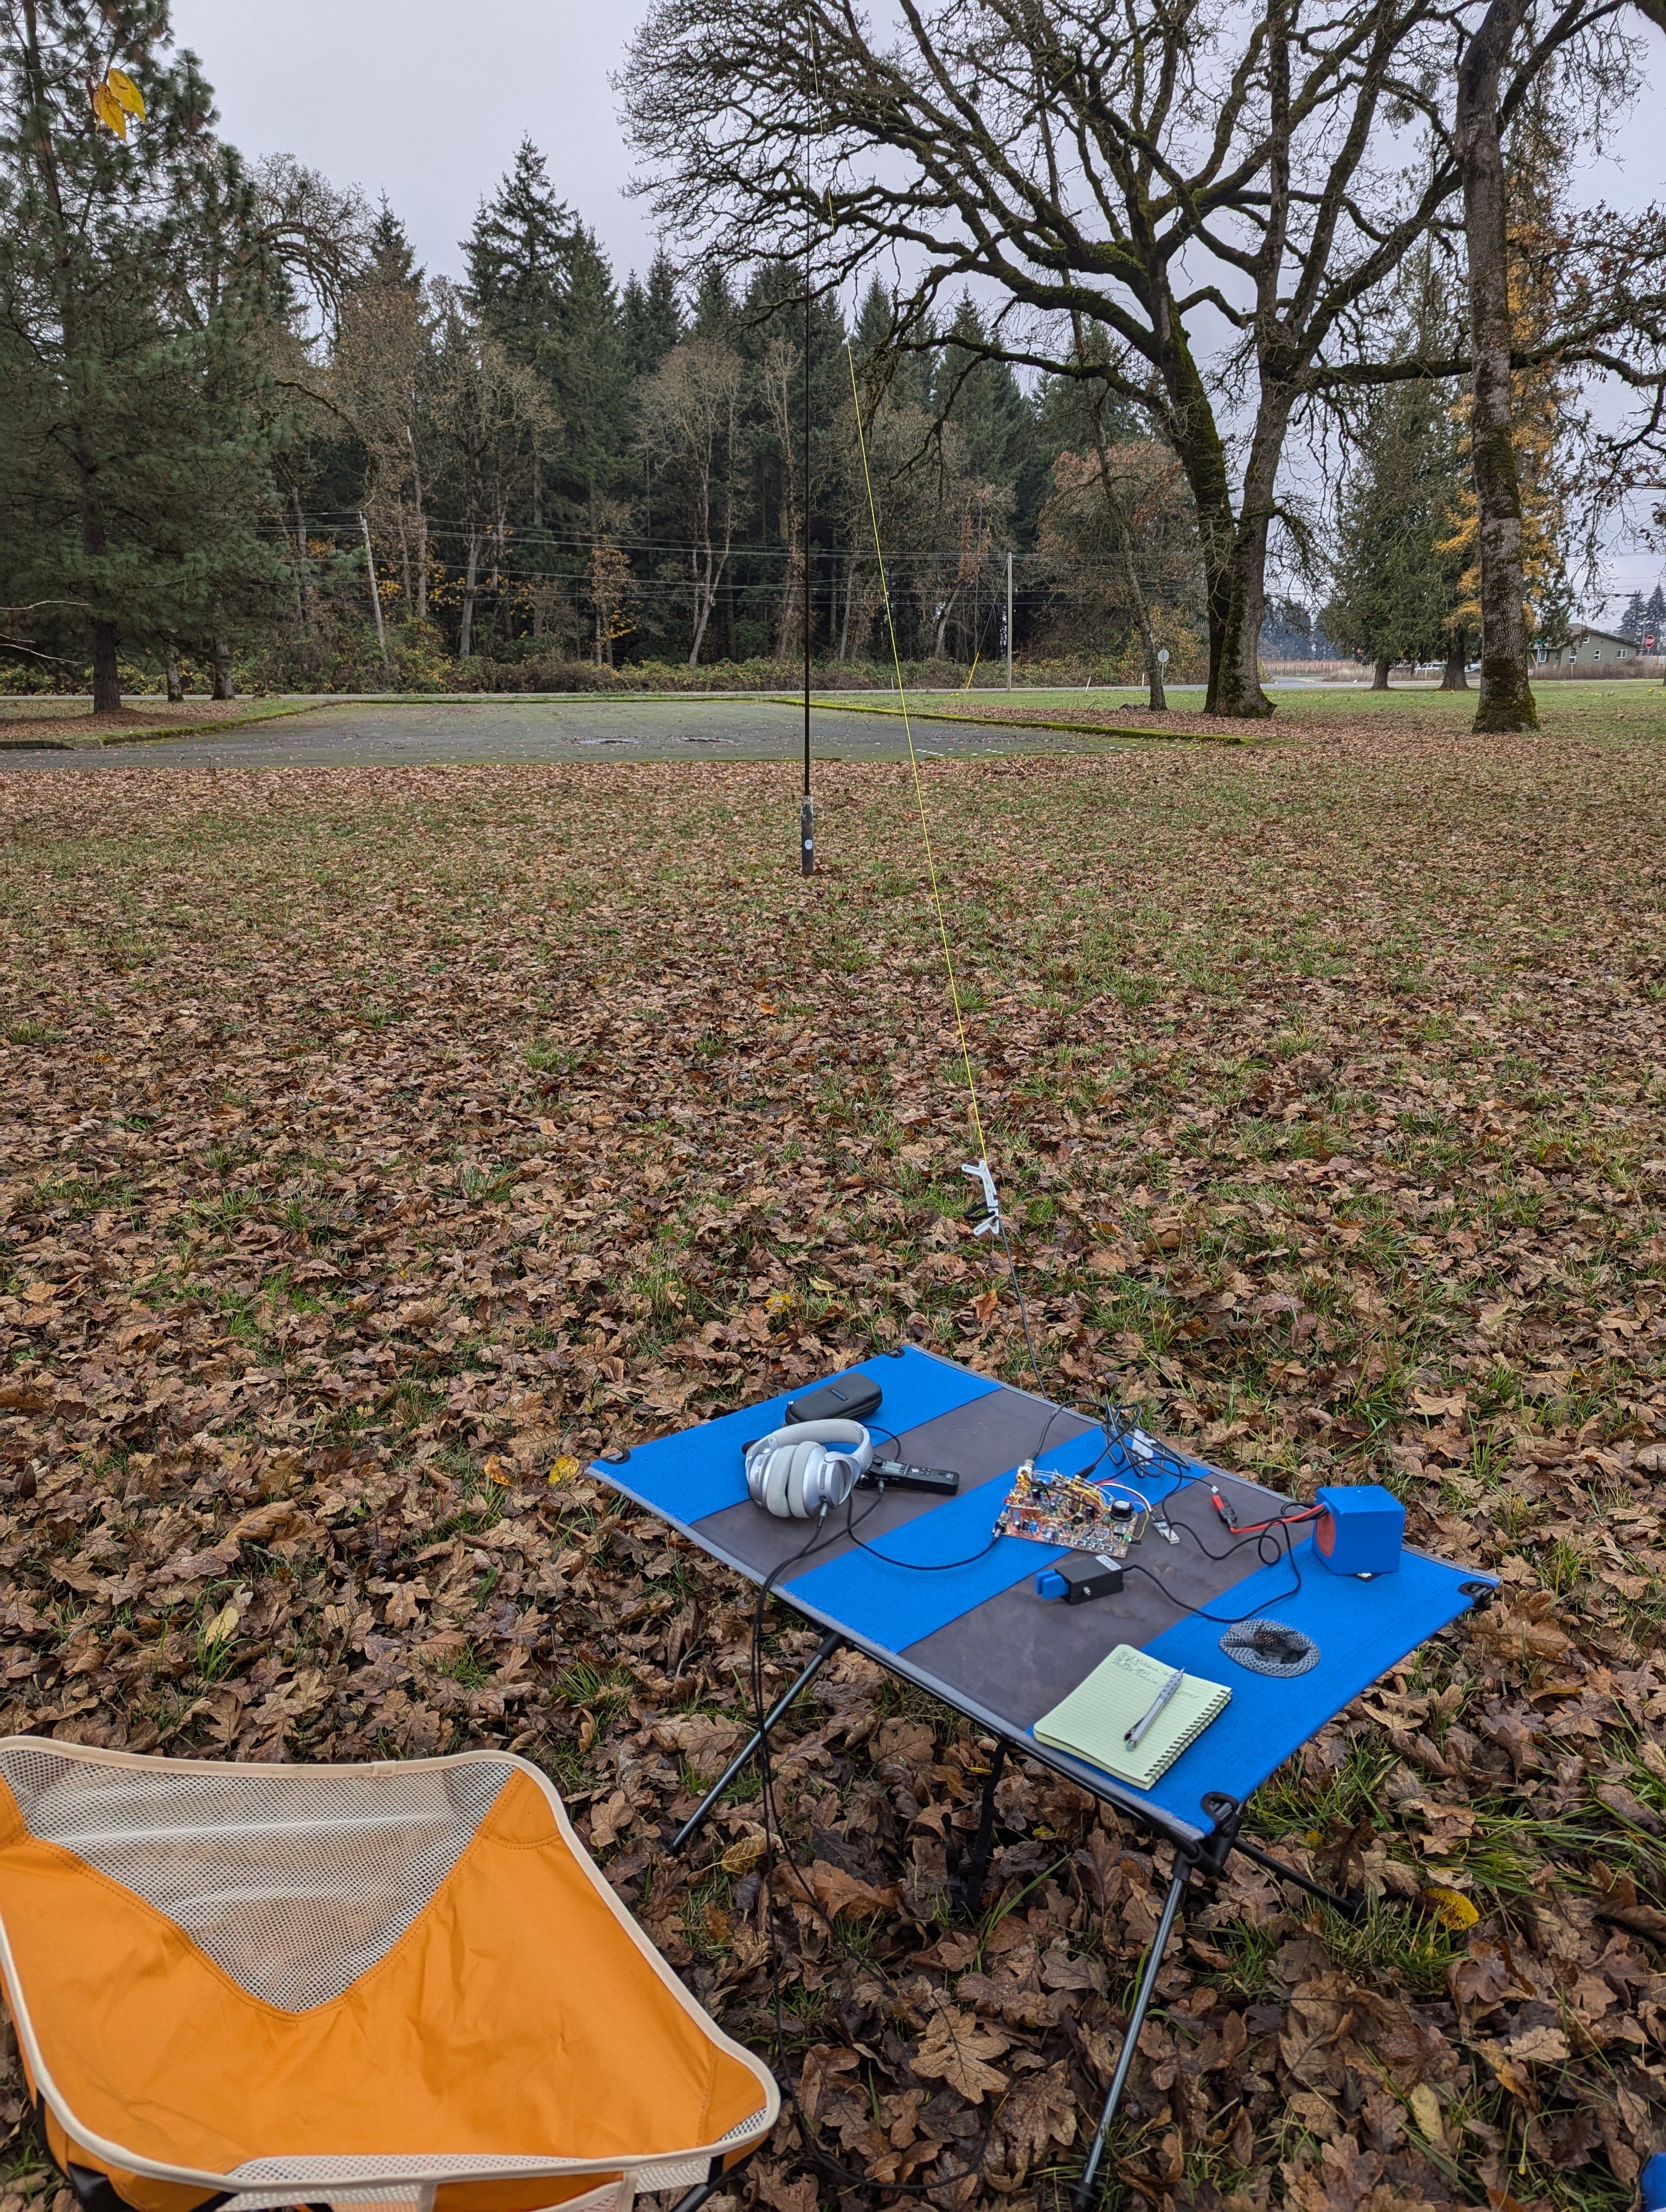
The day I’ve been building up to for a long time has finally arrived. I’ve got the MAX2681 Transceiver hardware and firmware in a state where I thought it was good enough to take out on a POTA activation, which was really the primary purpose of this whole radio design to begin with. I carefully packed the rig in a hard case with foam lining, gathered the antenna, battery, paddle, and other accessories and headed down to my nearby POTA park: US-0213 Maud Williamson State Recreation Area.
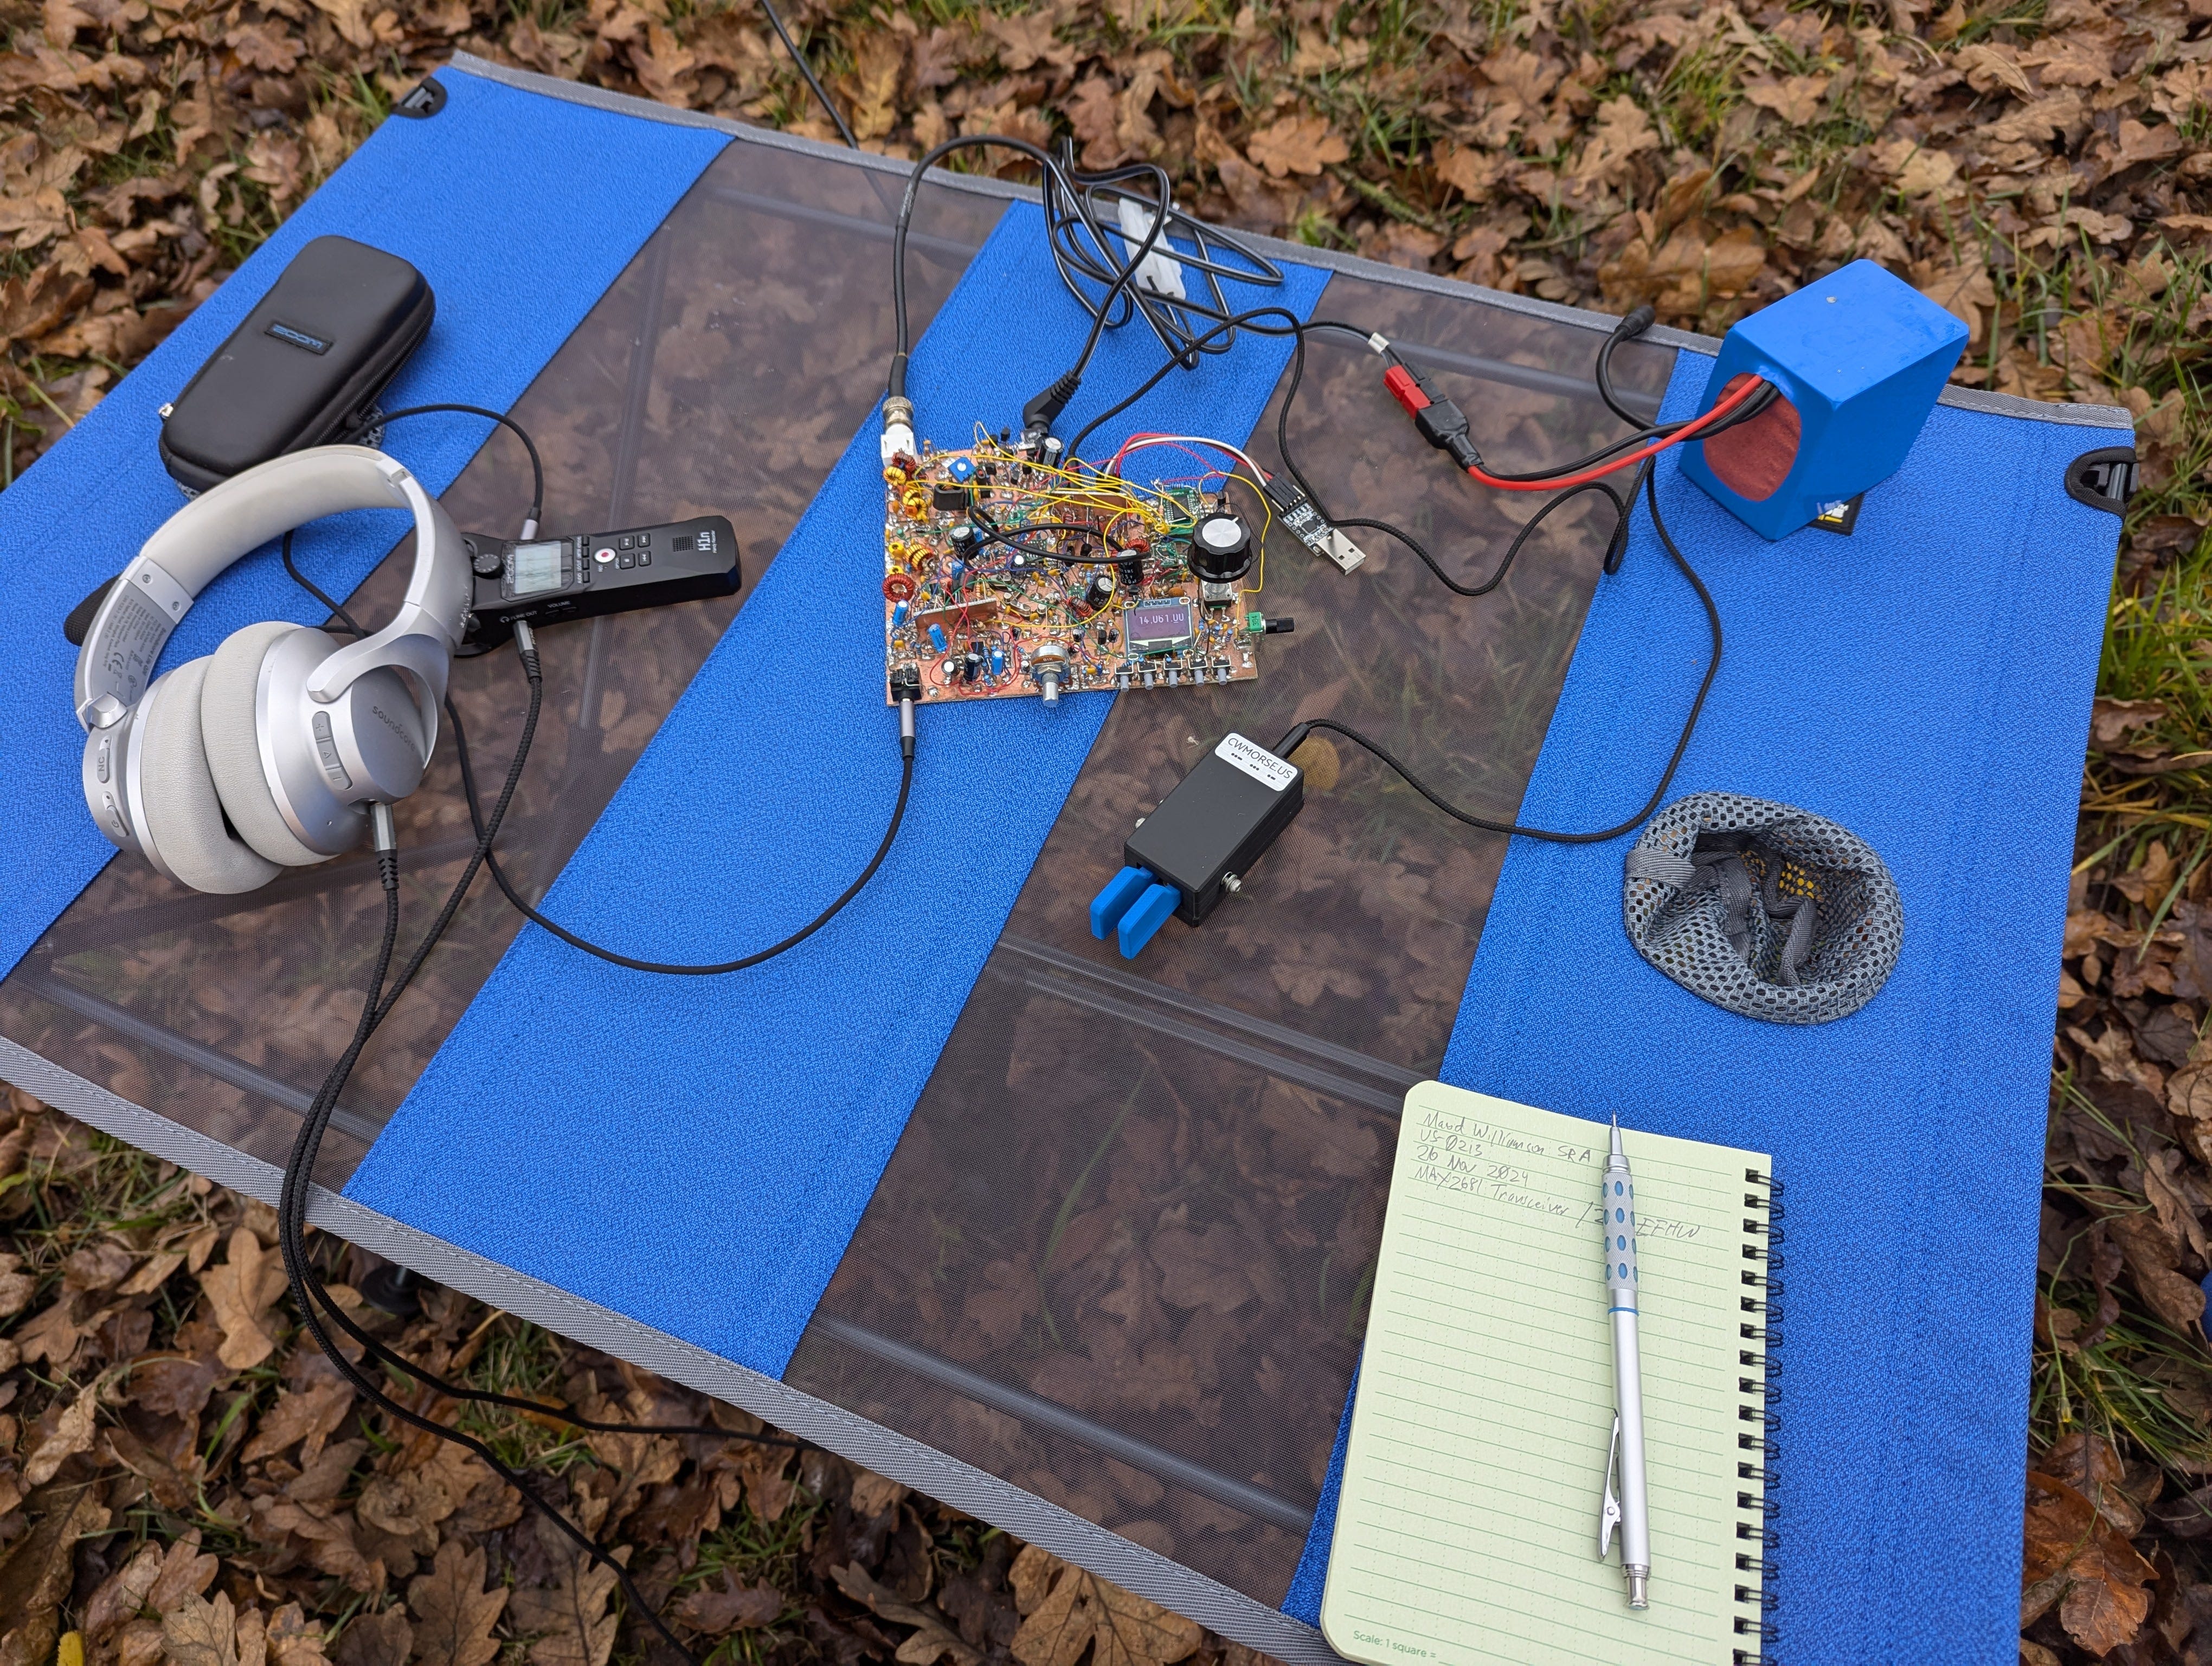
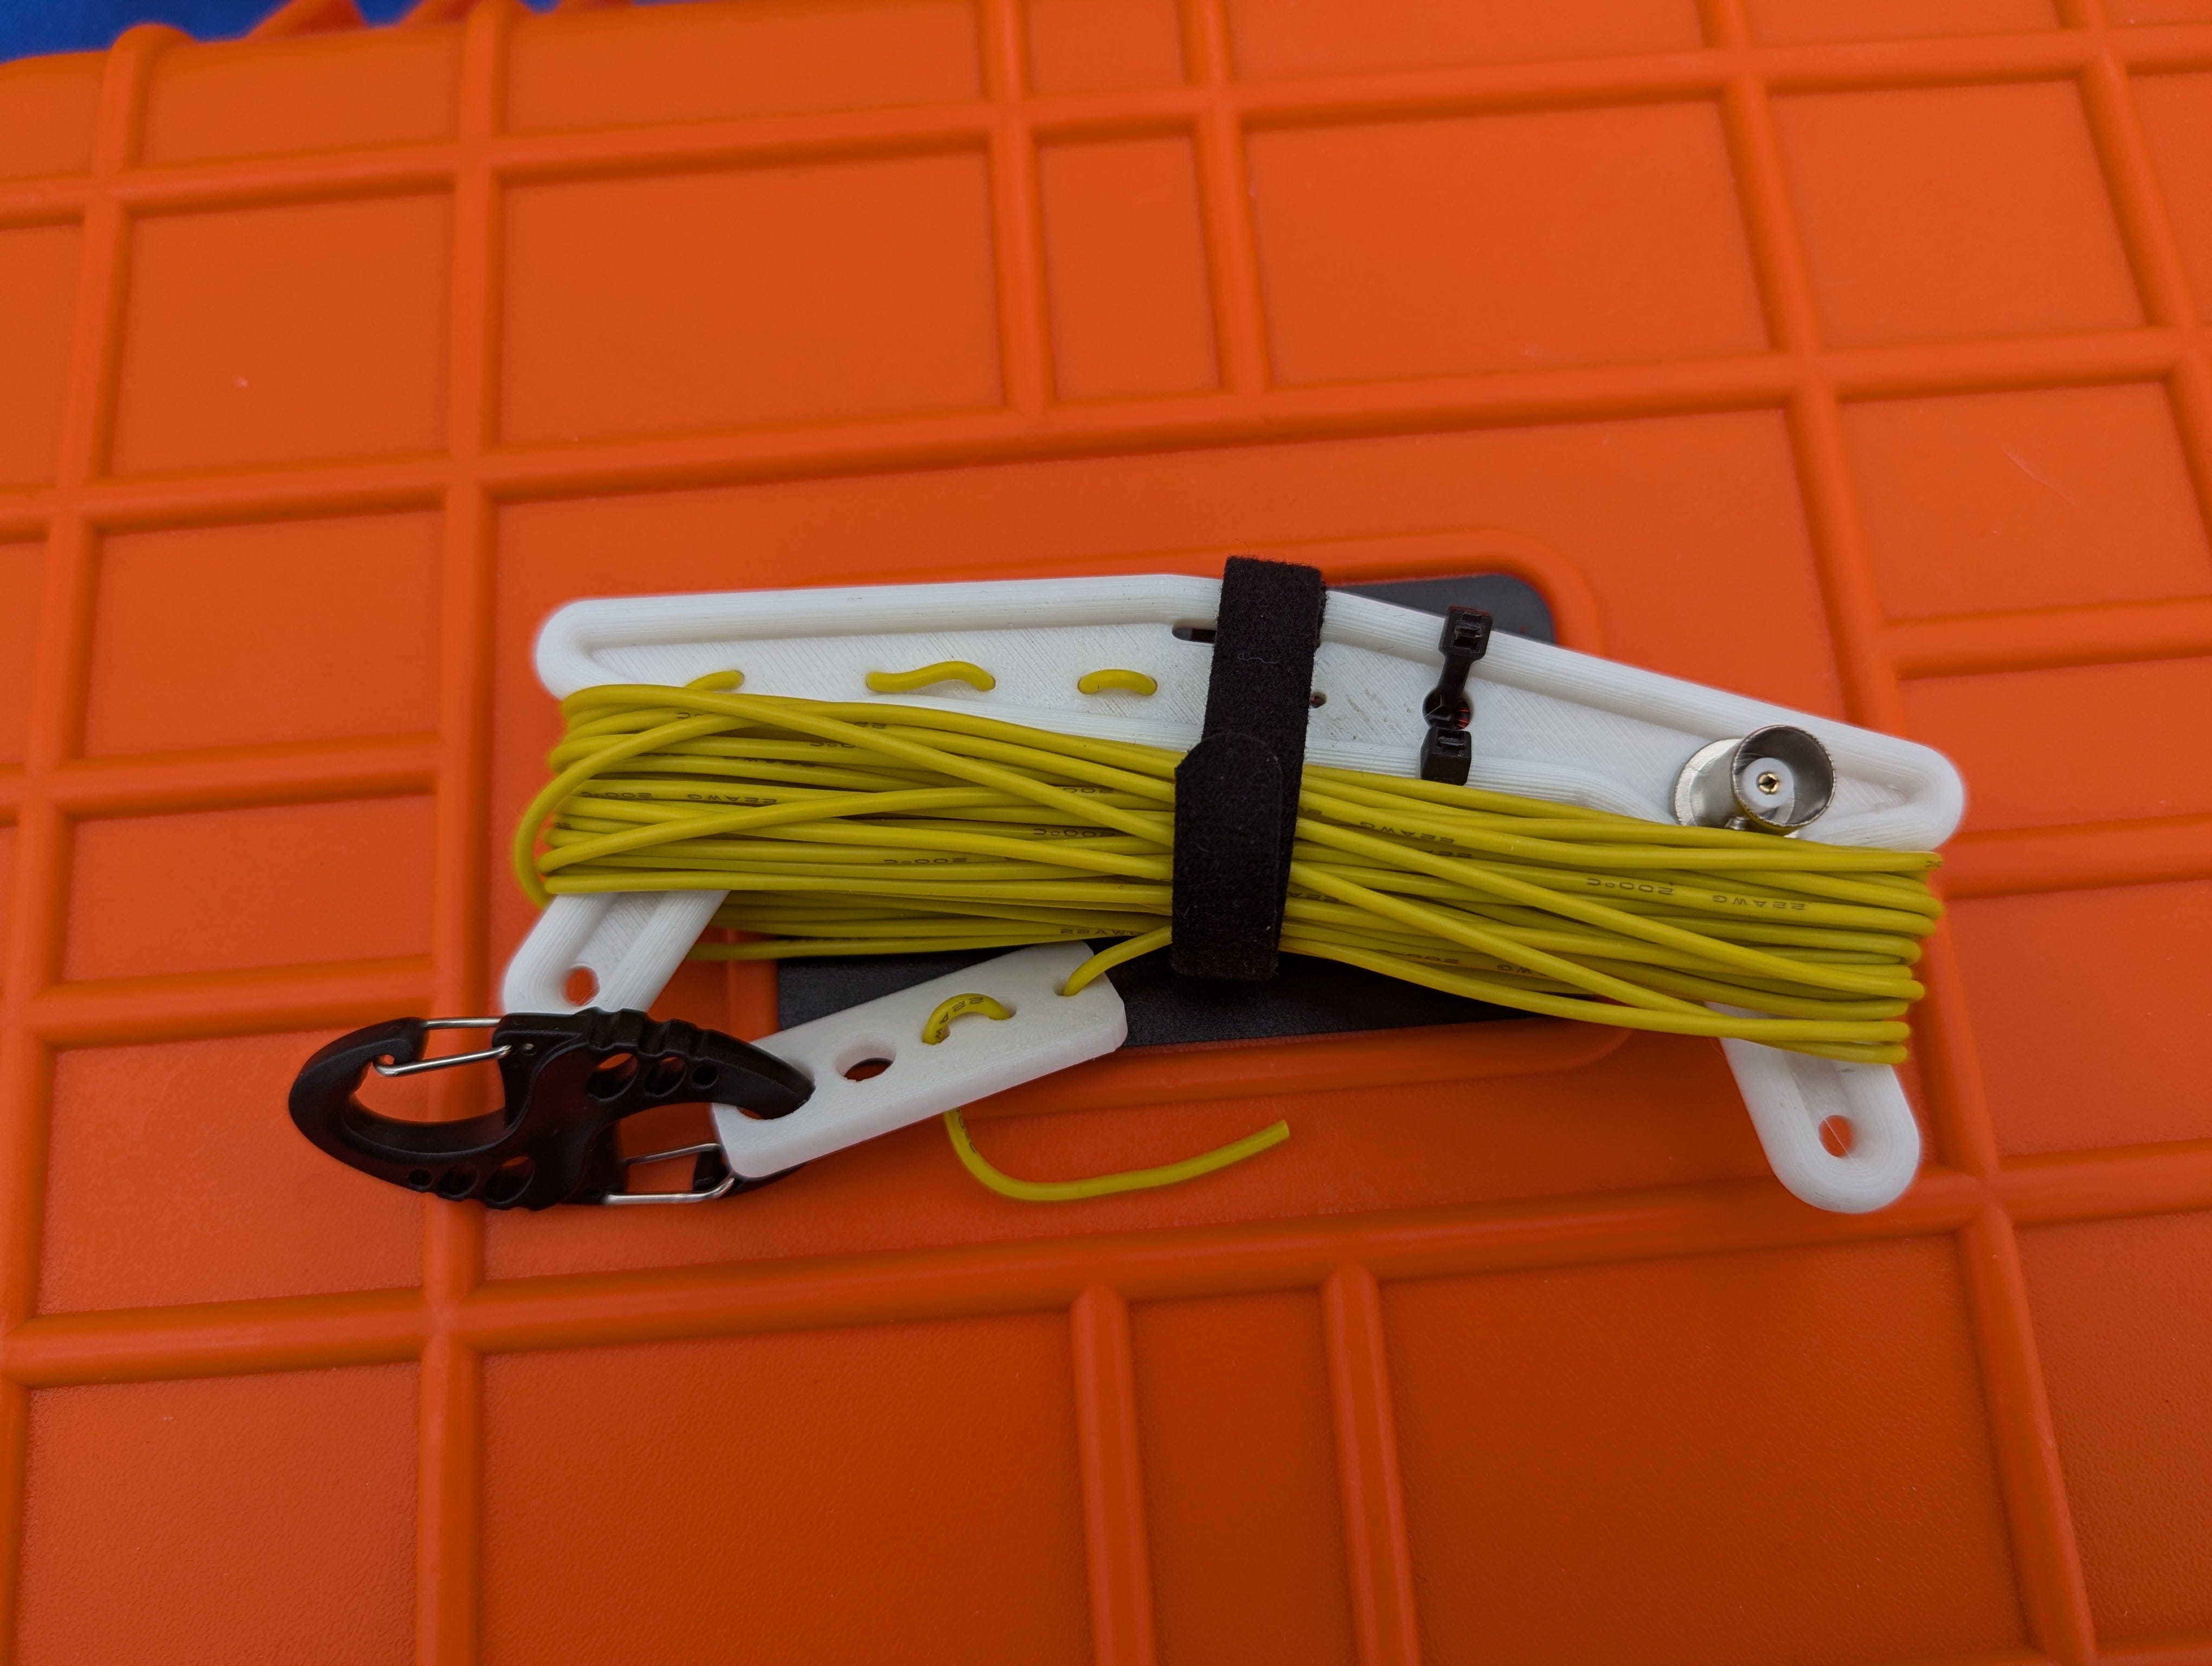
In order to keep this post relatively short and sweet, I won’t go through the entire gear list, however I wanted to specifically mention the antenna I deployed. I cut an end-fed half-wave wire for 20 meters and used it with the WinderTenna by KC3JRW, along with a 49:1 unun for QRP. I also designed and printed an end support for the antenna that had two mounting holes: one that would slip-fit on the end of my SOTABEAMS Tactical Mini 20 ft fiberglass mast, and another hole that would accept a small S-biner. This turned out to be an easy way to deploy the EFHW.
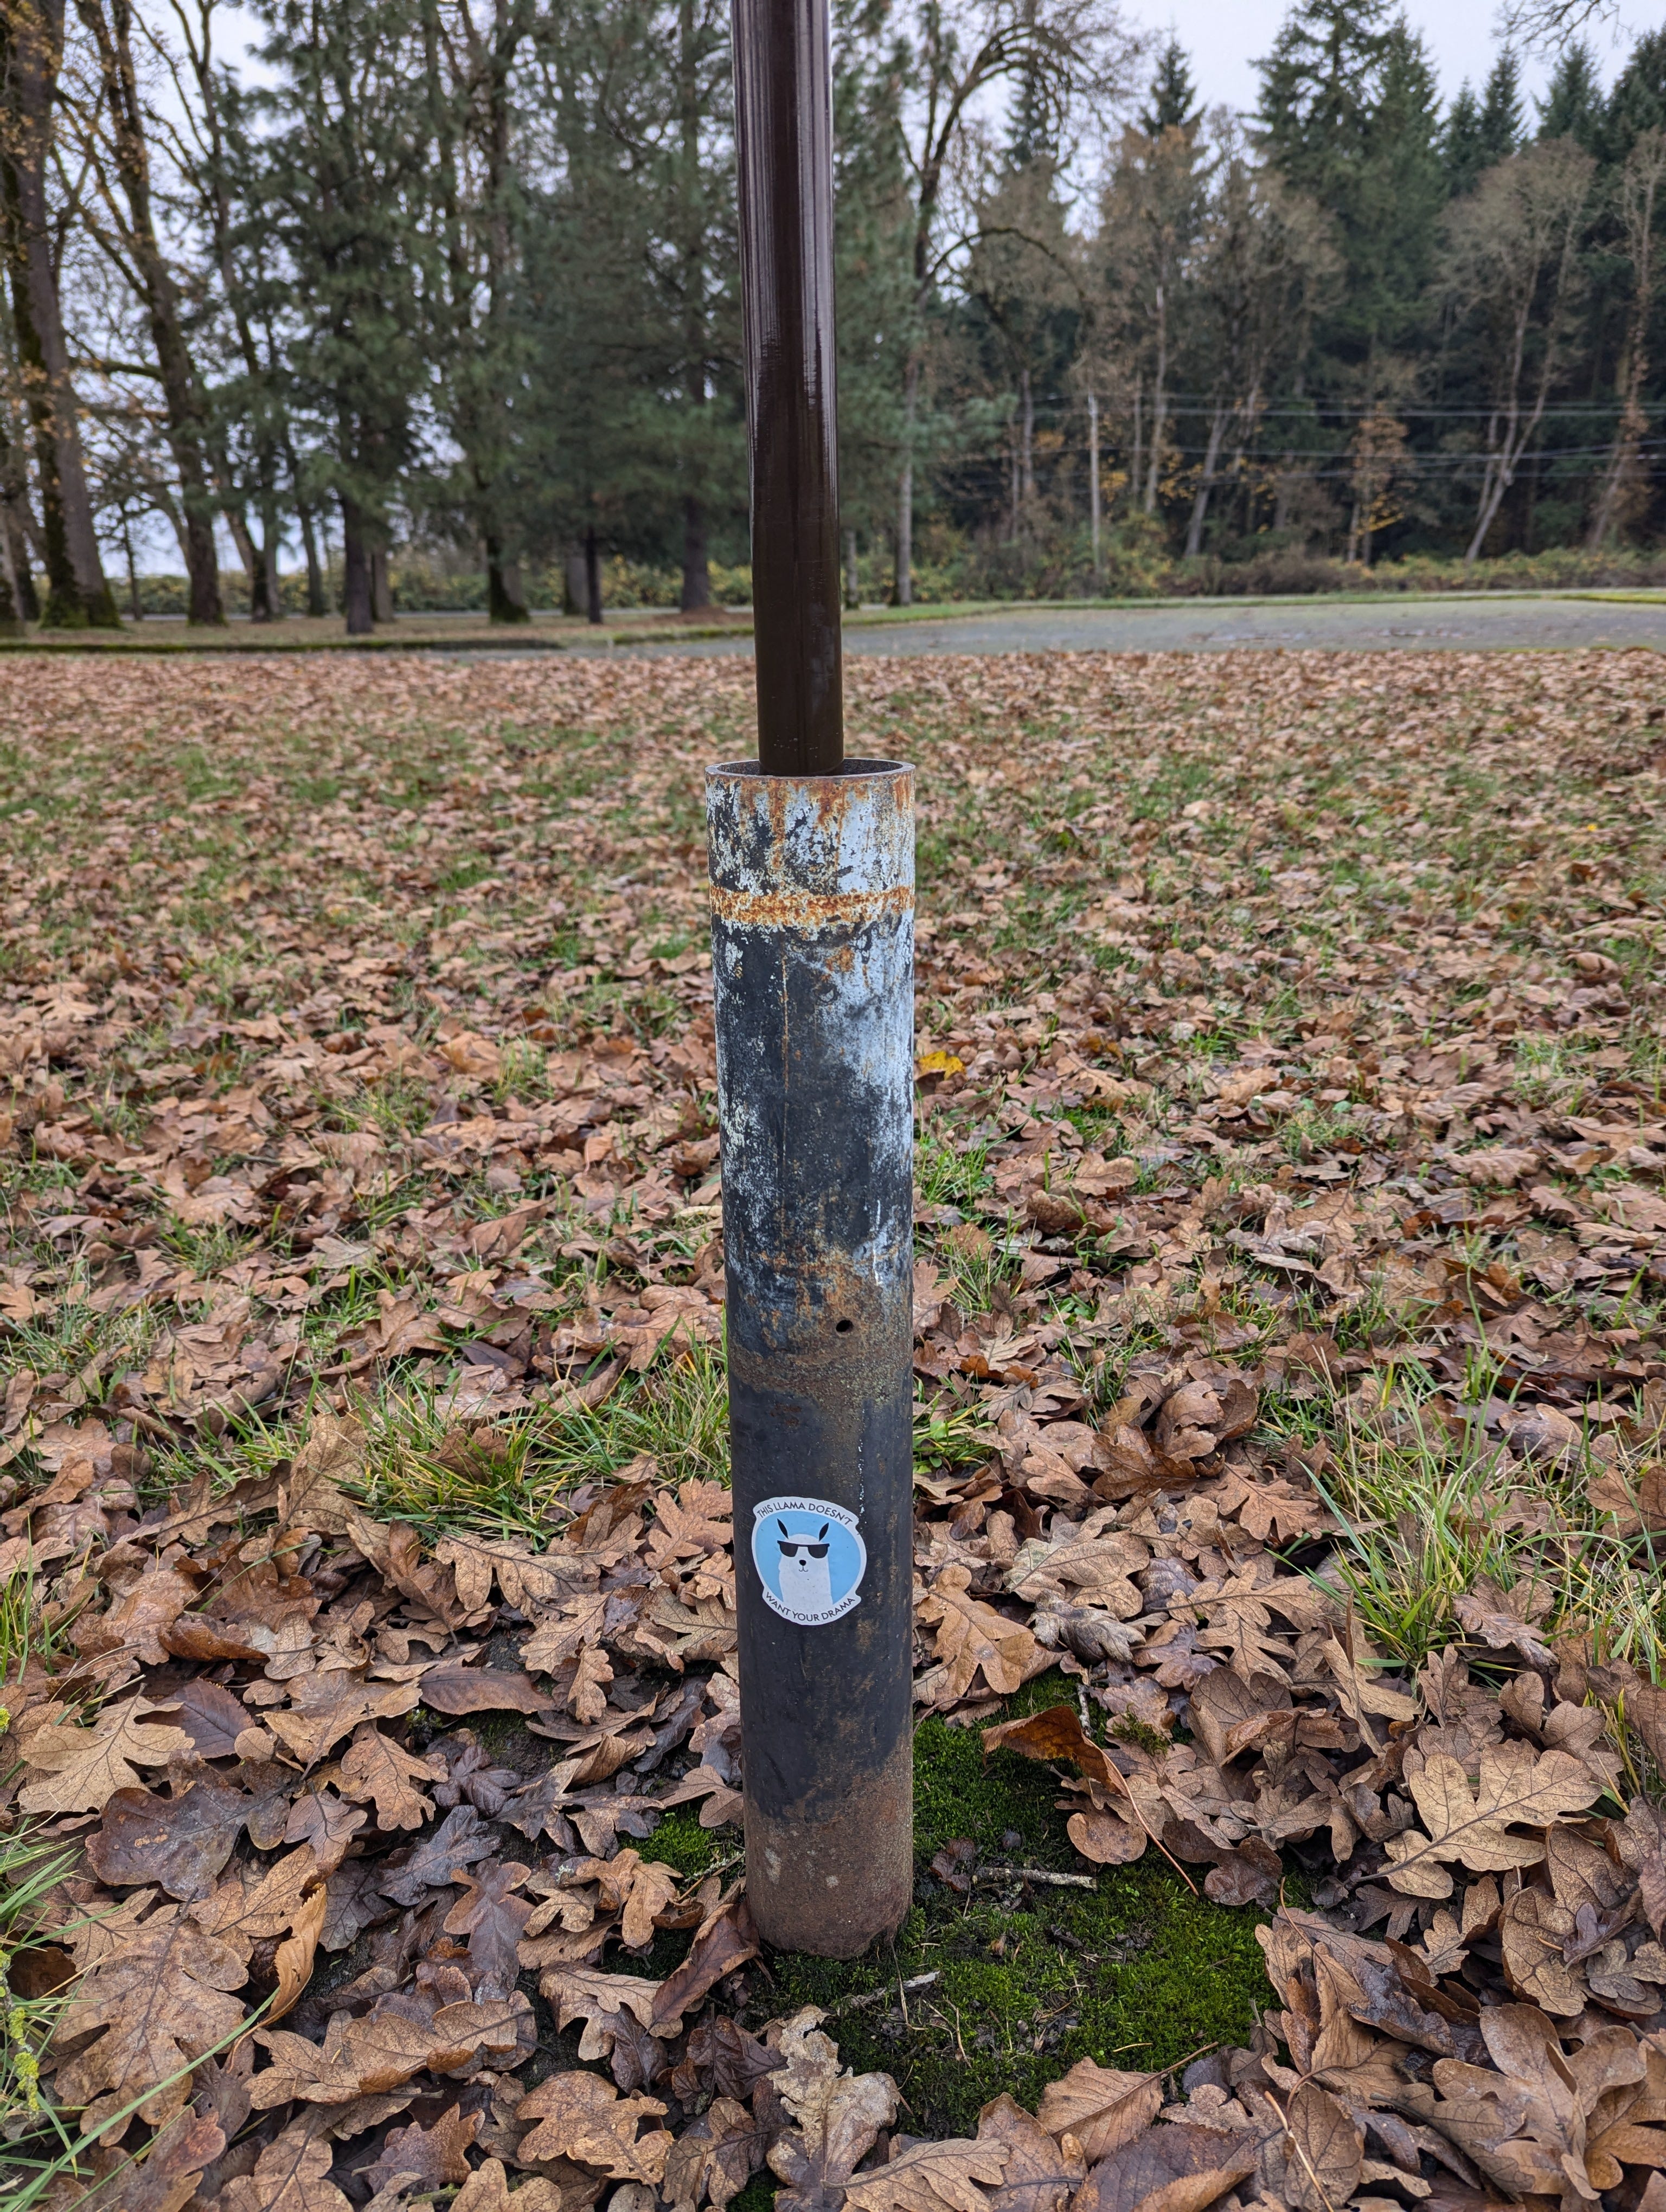
Very helpfully, there was a steel pipe set in concrete that was just begging to be used as a support for my mast, which I happily obliged.
I was able to set up my portable table and chair at just the right distance for the feedpoint of the EFHW and get on the air with very little fuss.
I don’t think that I’m going to become a full-time YouTuber, but I decided to record the activation for posterity. I do have to apologize for the audio quality on this recording. There were a couple of issues that I found: one during the activation and one afterward. You will hear a lot of clicking on the keying on this recording, which turned out to be the result of RF feedback getting into the radio as a result of using an EFHW with a very short coax feedline. I never had this problem on my home station (which uses a balanced antenna, fed with a balun and coax), so this was the first time I’d see it pop up. Fortunately, it wasn’t bad enough to derail my operation. The other reason the audio quality is poor is that I inadvertently used the wrong audio cable for my Zoom recorder (a TRRS cable instead of TRS). This greatly degraded the recording quality. Rest assured that the receiver sounds much better in actual use.
I didn’t have a ton of time for this activation, as I had to get my oldest to his orthodontist appointment a couple of hours after I started, but conditions were fairly good and I had no problem getting more than the necessary number of QSOs in the log for a successful activation. I was a bit worried that there might have been some latent bugs in the keyer firmware, but I’m pretty sure I got most of the bugs out, as all of my keying mistakes were purely on me.
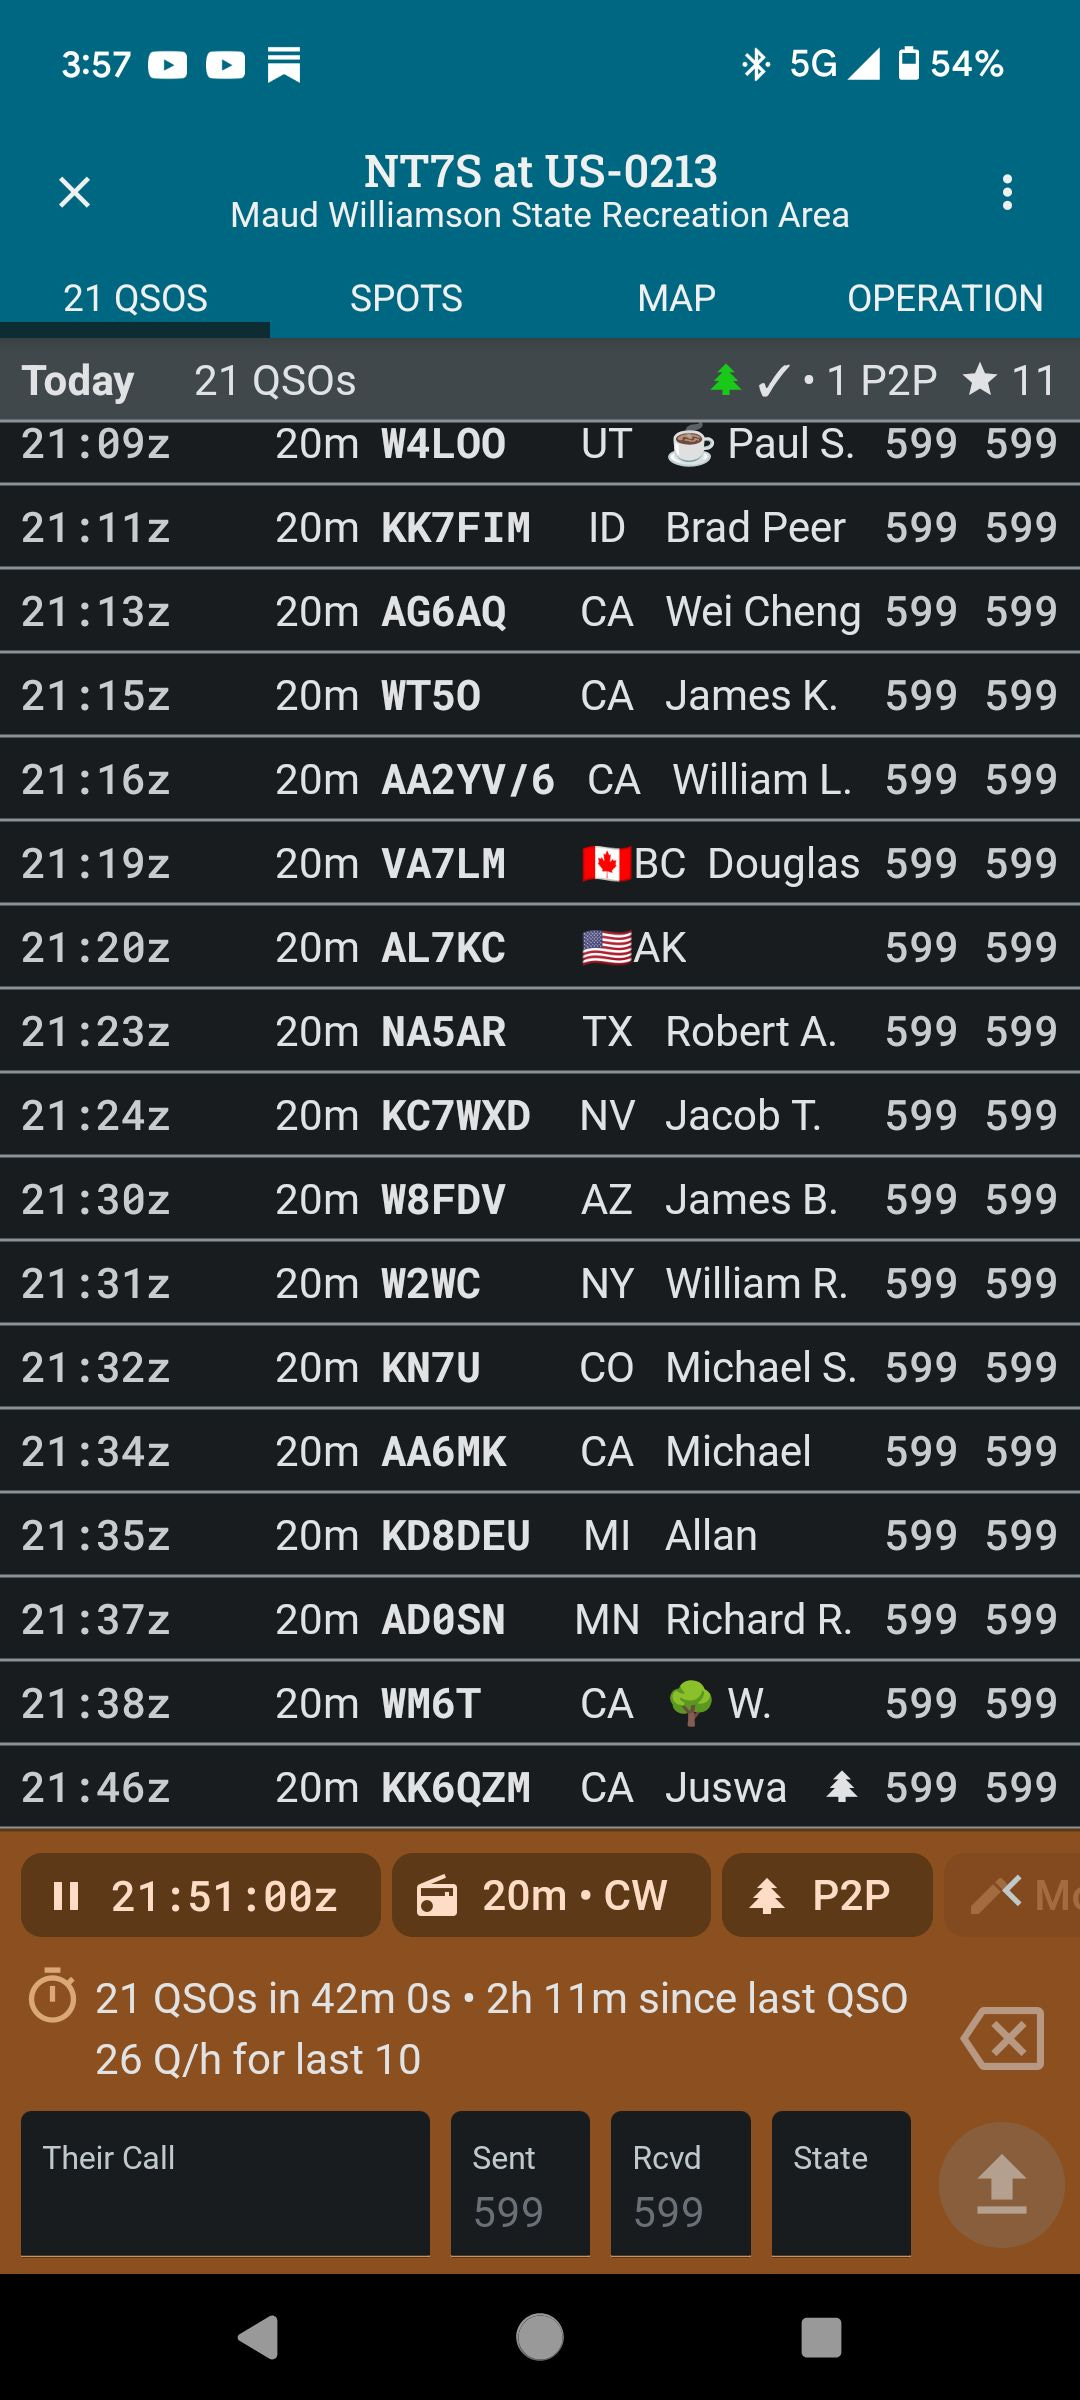
Here’s the map of my QSOs, which covered a wide swathe of the United States, save the South. All in all, it was an very enjoyable and satisfying day. I got the radio to do what it was meant to do from the beginning and I found another issue that only would have been found by actually using the rig in a real-life situation.

Lessons Learned
The RF feedback problem wasn’t surprising in hindsight, but I had just kind of forgot about the possibility when I was building this radio. It seemed to me that the likely problem is that I neglected to put any kind of choke on the +12 VDC input, so today I dug out a ferrite bead and installed it between the DC power jack and the node where all of the +12 V power was distributed to the rest of the board. For good measure, I also added some snap-on ferrite beads near the BNC connectors of my coax jumper. I set up the same station and same antenna back at home, and tested radio with the the fixes. This time I had no keying artifacts at all (and even had someone come back to my TEST TEST TEST transmission), so things are looking good there.
Now that I know the causes of my poor recording, I won’t make the same mistake again. I just retested the Zoom recorder with the MAX2681 transceiver using the right cable, and the recording has much better fidelity now. I’m not an A/V guy, so I’ve still got a learning curve on this stuff as well! For what it’s worth, I did get to learn some new skills using a video editor to put together the above video for you.
What’s Next
I’m pretty sure I want to take the rig out for another POTA activation to make sure I’ve properly fixed all of the problems and it’s rock-solid. So keep an eye out for that…as long as the weather cooperates. Once that’s done, it will be time for me to retrofit the new microcontroller, so that I can get the last of the features written for the firmware, and then I can turn my eye towards the Design For Manufacturing stage of this saga. Thanks for following along with me!
Impressive. Great work Jason!. Also ,I feel glad you found full time employment and hope this boosts your families' quality of life. Todd